Sunday, August 20, 2017

General D'Armee game of Sawmill Village


So I am much taken with these rules as a set for use with my Peninsular collection of 15 and 18mm Napoleonic figures. This collection is small, in that it was originally painted up for use with Principles of War rules. In 15mm terms this means that every unit is a brigade or regiment represented on the table by 9 infantry on three bases each of 3 figures, and cavalry are 6 figures strong.  The concept is to be able to fight Corps level battles on a 6 foot by 4 foot table. Over the years PoW have and do provide an excellent game but the rules can be slow and one is committed to a whole day or a long evening to complete a game.
I have often wanted to have some other rules for the figures, and while in Nigeria and India had used them with Black Powder very successfully.
Last week a friend stopped over to visit Waterloo and we managed to get in a game of Sharp Practice 2 and a game GDA. Bingo! The clog dropped.
This weekend my good lady has taken herself off to a Yoga Festival in Ghent. The mice played.
Using the scenario based on a the Sawmill Village fight I set up a table to test GDA for and encounter battle based on an approach march up the length of the table and a tussle for the centrally placed town. I had intended it to be a village but it turned out to have 5 Built Up Areas, not the one or 2 that I had intended.
The approach marches looked excellent, and cavalry, in the shape of French dragoons quickly came into action again st some British Dragoons.


There was a lot of bouncing off and retirement. The French occupied the town due to some dilatory ADCs who delayed things on the allied side and so the lights found themselves attacking a built up area full of Frenchmen. They had to hope their cavalry held up as Vistula Lancers rode boldly toward them. 2 French batteries came into action too. At this point we realised that under the rules there was no way the French could advance from the village. They would have to around it and that meant winning cavalry superiority. And since we were approaching time we ended the game. And proceeded to work out some what ifs for the future. Hugely enjoyed the game and the rules. Now to find a way to load the pictures.
PS. Cracked it. Cannot do it from the Ipad, but the PC works just fine.

Tuesday, March 7, 2017

Finally a game.

Managed after 6 months to play the first game at the new place.


It was not ideal as we had to lug the table top up from the garage and lay it over the dining table. However it did mean that we had a proper matrix into which to set the TSS tiles that I have on long term loan from Stefan.


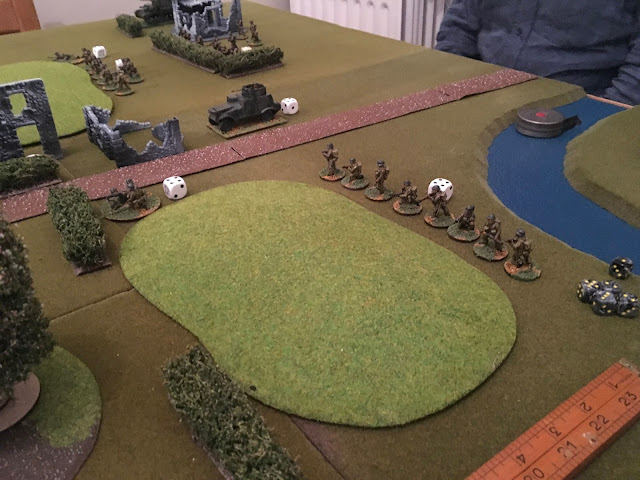
So the first game saw my collection of 1940 Brits and Germans take the field. There were four of us to be entertained and we wanted to see if Bolt Action was easily learned and would make a good multiplayer game.


To keep it simple both sides were classed as regular, and consisted of a platoon of infantry with the organic support of light mortars and ATGs, plus one MG on a tripod. The germans fielded 9 figure sections and the brits 8s. The British also had one Morris CS9 Scout car, and an A9 tank. Germany fielded a mighty Panzer 2 and a 231 6Rad armoured car.


So the brits held the ridge line and the village and the Germans advanced up the road. First blood went to the A9 which immobilized the over bold 231. That recovered its composure and starters a regular pounding of its tormentor. The pins started racking up on the A9 and in the end the tank was reduced to inaction. With may pins it was impossible to rally successfully and it could not easily hit.


2 Sections of Heer advanced to the German right of the road, taking advantage of an area of woodland to cover their approach. It got a bit crowded int there. Some wag recalled the Monty Python Gasmen sketch.


The British player had put most of his units on overwatch. And then realised that he had hidden them too well behind the ridge. In particular his fixed team MMG was in danger of being outflanked.


The third Section broke cover and  charged the front of the house. They got the full benefit of the MMG and a second section but still managed to make contact and did damage. Especially as it was aided by the light mortar which dealt with the crew of the 2 pdr.


Back to the woodland a section charged the brits but fell short (6 inch move in rough ground) allowing the CS9 to support the MMG team that could not traverse in time. Half the section went down to the Bren and to the British section that advanced to the hill crest in front of them to see what the noise was about. The pins accumulated and 9 were duly reached. Combat efficiency ceased to be and off they went. The second section advanced and suffered a similar fait in what had become a killng ground.  Game over, the German platoon, or what remained withdrew, covered by the Panzer 2.


An interesting experience. The rules worked in a small group with clear and small commands. The fact that there was always something going on meant that there was great scope for banter, and ours is a very chatty group.


We were please that the rules were rather more subtle than we thought, it was necessary to keep to cover, fire and movement paid off, and some of the moves would have been better with the use of the light mortars to provide smoke. We will try out Chain of Command as a group activity on the next outing, but I think for an evenings amusement to wind down at the end of a hard week BA will do just fine.


I did take some pictures, but used my I-Pad and then got caught up in the umpiring and so lost my jouranlistic objective. So here they are. You will note the use of Saga dice to define who activated, and D6 for the order dice. Of course I found where I had safely placed the BA order dice as soon as I had packed it all away... Ah well.